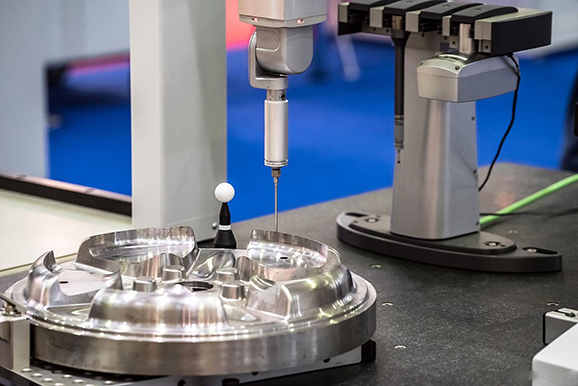
Visual Inspection Case Study: Inspection of Appearance Defects in Automotive Bearings
Bearings are a crucial component in the automotive manufacturing industry, their quality directly impacting vehicle safety and performance. Therefore, the inspection of bearing appearance defects is particularly important. Traditional inspection methods largely rely on manual visual inspection, but this method is not only inefficient but also susceptible to human factors, leading to missed or false detections. With technological advancements, visual inspection technology is increasingly widely used in the inspection of appearance defects in automotive bearings.
I. Inspection Items:
1. Surface Cracks: Cracks or fissures on the bearing surface may be caused by material fatigue, overload, or other factors.
2. Surface Wear: Surface wear is usually caused by friction, abrasion, or other abrasive materials, which may cause the surface to become rough or lose its smoothness.
3. Surface Dents: Surface dents may be caused by foreign objects, particles, or poor machining, affecting the flatness and quality of the bearing surface.
4. Surface Oxidation: Surface oxidation is usually caused by prolonged exposure to air or chemicals, resulting in an oxide layer or corrosion on the surface.
5. Surface Foreign Matter: Foreign matter adhering to the bearing surface, such as dust, metal shavings, paint residue, etc., may affect the normal operation and lifespan of the bearing.
6. Surface Deformation: Abnormal surface deformation may be caused by problems during the manufacturing process or external factors, affecting the bearing's geometry and performance.
II. Inspection Process:
1. Data Acquisition: Acquire a large amount of image data of normal and defective automotive bearings.
2. Data Processing: Preprocess the images, such as denoising and contrast enhancement.
3. Feature Extraction: Extract automotive bearing features, such as texture, shape, and color, using algorithms.
4. Model Testing: Validate the test data and evaluate the model's performance and accuracy.
5. Specific Application: Deploy the trained model in a real-world inspection environment to detect surface defects in automotive bearings in real time.
III. Inspection Challenges:
1. Product Diversity: The defect morphology and location of automotive bearings are diverse, requiring the model to have strong generalization ability.
2. Illumination Conditions: Unstable lighting conditions in the workshop may affect image quality and increase the difficulty of inspection.
3. Data Labeling: Obtaining a large amount of accurate labeled data is crucial for training an effective model, but the cost of acquiring labeled data is high.
4. Real-time Performance: Bearing inspection needs to be performed in real-time on the production line, requiring high speed and accuracy.
IV. How to Detect: High-definition cameras capture bearing images, which are then analyzed and processed using image processing algorithms to automatically detect bearing surface defects. This method not only significantly improves inspection efficiency but also reduces human error, enhancing accuracy and reliability.
In practical applications, vision inspection systems can observe the bearing surface from multiple angles and scales to detect defects such as cracks, dents, and impurities. Once a defect is detected, the system immediately issues an alarm, alerting operators to take action. Simultaneously, the system can automatically classify and statistically analyze defects, providing strong data support for quality control and improvement during production.
V. Advantages of Vision Inspection:
Automation: Vision inspection technology enables automatic detection of bearing surface defects, improving the automation level and efficiency of the production line.
Intelligence: Combining big data and cloud computing technologies allows for intelligent optimization of the production process, improving production efficiency and quality.
High efficiency: The system can provide accurate detection results quickly and in real time.
Accuracy: The detection process is fully automated, objective, and non-contact, ensuring extremely high accuracy.


